How to Build a Simple Gravel Garden Path
A gravel path is one of the simplest ways to connect garden beds, define outdoor spaces, and make a backyard easier to walk through. Learn how to plan the route, prepare the ground, install edging, add a suitable base, and finish the path with gravel.
A garden path doesn’t have to be complicated.
You don’t need poured concrete, expensive paving stones, or a large construction crew to create a useful walkway.
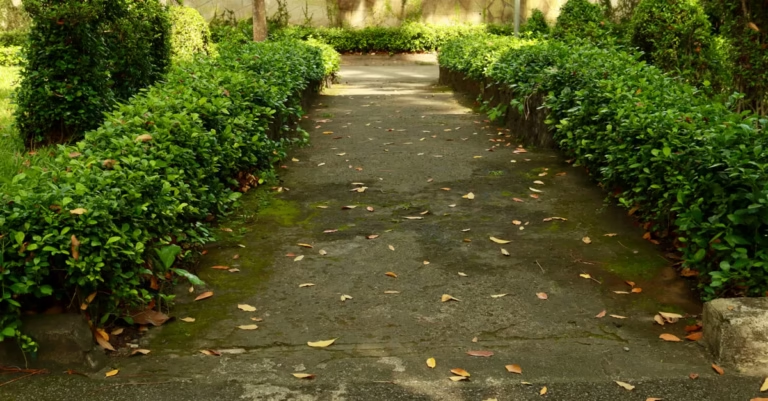
A simple gravel path can define garden areas, connect different parts of your backyard, and give the landscape a more finished appearance.
It’s also a project that can be completed in manageable stages.
The basic process is:
Plan → mark → prepare → edge → build the base → add gravel → maintain.
Why Choose Gravel?
Gravel is popular for garden paths because it is relatively simple to install and can work with many different landscape styles.
A gravel path can:
- Connect garden beds
- Improve access
- Define outdoor areas
- Reduce muddy walking areas
- Create a casual natural look
- Be easier to modify than a permanent paved surface
It also works well alongside gardens, raised beds, trees, and other backyard features.
Step 1: Plan the Route
Before moving any soil, decide where the path should go.
Walk the route several times.
Think about how you’ll actually use it.
Does it connect the areas you visit most?
Is it wide enough to walk comfortably?
Does it avoid unnecessary sharp turns?
Does water naturally drain away from the path?
A practical route is more important than a perfectly straight one.
Step 2: Mark the Path
Once you’ve decided on the route, mark both sides.
You can use:
- Landscape marking paint
- Rope
- Garden hose
- Stakes and string
Stand back and look at the shape from different angles.
This is the easiest time to change the design.
Moving a line with a hose is much easier than moving several loads of gravel.
Step 3: Decide on the Width
The width depends on how the path will be used.
A narrow garden walkway may only need enough space for comfortable foot traffic.
A main path leading through the backyard may benefit from additional width.
Consider whether people will walk side by side, carry gardening tools, or push a wheelbarrow along the route.
Plan for how you’ll use the path in real life.
Step 4: Remove the Surface Material
Once the path is marked, remove grass, weeds, and loose organic material from the path area.
Try to create a consistent excavation depth.
You don’t necessarily need to dig extremely deep.
The required depth depends on:
- Soil conditions
- Path use
- Gravel type
- Base material
- Drainage
- Local conditions
The goal is to create enough space for a stable path structure without unnecessary excavation.
Step 5: Check Drainage
Water is one of the most important things to consider before building a path.
A path that becomes a puddle after every rainstorm will quickly become frustrating.
Look at the surrounding landscape.
Ask:
Where does rainwater currently go?
You don’t want the path to unintentionally block natural drainage.
If water consistently collects in the proposed path area, solve that problem before finishing the surface.
Step 6: Install Edging
Edging helps keep gravel contained.
Without edging, loose gravel can gradually spread into surrounding lawn and garden beds.
Possible edging materials include:
- Metal landscape edging
- Stone
- Brick
- Timber
- Other suitable landscape borders
Choose an edging style that fits the rest of your backyard.
It should be sturdy enough to keep the path defined.
Step 7: Prepare the Base
For a long-lasting gravel path, the surface underneath the visible gravel matters.
A suitable compacted base can help create a more stable walking surface.
Spread the base material evenly.
Then compact it thoroughly.
Don’t rush this step.
A poorly prepared base can result in:
- Uneven areas
- Soft spots
- Rutting
- Gravel migration
The better the foundation, the better the finished path is likely to perform.
Step 8: Add the Gravel
Once the base is prepared, add the selected gravel.
Spread it evenly across the path.
Avoid dumping a huge pile in one place and trying to move everything afterward.
Working in smaller sections can make it easier to achieve an even depth.
Rake the surface smooth as you go.
Step 9: Compact the Surface
Depending on the gravel and path design, light compaction can help settle the material.
Walk over the surface or use an appropriate compactor for larger projects.
You may need to add additional gravel after the first settling period.
That’s normal.
Gravel paths can require occasional topping up as material shifts or settles.
Choosing the Right Gravel
Not all gravel behaves the same way.
Consider:
- Stone size
- Shape
- Color
- Texture
- Availability
- Drainage characteristics
- Intended use
Rounded decorative stones can move more easily underfoot.
Angular crushed stone can interlock more effectively.
The best option depends on the look and performance you’re trying to achieve.
Think About Wheelbarrows
If you’re a gardener, don’t design the path only for walking.
Consider your tools.
Will you regularly push:
- A wheelbarrow?
- A garden cart?
- A mower?
- Heavy bags of soil?
A path that’s comfortable for walking may not be ideal for moving garden materials.
Plan the project around your actual routine.
Create Curves Carefully
Curved paths can look natural and inviting.
But don’t make the curves so tight that they become awkward to walk.
A gentle curve can also help the path feel integrated with the surrounding garden.
Use a hose or rope to experiment with curves before committing to the final shape.
Add Plants Around the Path
Once the path is finished, the surrounding planting can make a huge difference.
Consider planting along the edges with suitable:
- Perennials
- Grasses
- Shrubs
- Ground covers
- Seasonal flowers
Leave enough space between plants and the path for mature growth.
You don’t want the walkway to disappear underneath vegetation within one season.
How Much Gravel Do You Need?
Measure the path before purchasing materials.
For a simple rectangular section:
Length × Width × Depth = Cubic Feet
If your path changes width or has curves, divide it into smaller sections and estimate each one separately.
Then add the sections together.
To convert cubic feet into cubic yards:
Cubic Feet ÷ 27 = Cubic Yards
It’s better to calculate the approximate volume before ordering material rather than guessing from the appearance of the pile.
Common Gravel Path Mistakes
Making the path too narrow
A path that’s difficult to walk on won’t get much use.
Skipping the base
A good surface starts underneath the visible gravel.
Ignoring drainage
Standing water can damage the path and surrounding landscape.
Using no edging
Gravel can gradually migrate into lawns and planting beds.
Choosing gravel only for appearance
The prettiest stone isn’t always the most practical walking surface.
Forgetting maintenance
Gravel paths need occasional raking and topping up.
Maintaining a Gravel Path
Maintenance doesn’t have to be difficult.
Every few weeks, inspect the path for:
- Low spots
- Weeds
- Spread gravel
- Puddles
- Damaged edging
Rake displaced gravel back into place.
Remove weeds before they become established.
Add fresh gravel when the surface becomes noticeably thin.
Small maintenance tasks are much easier than rebuilding the entire path later.
A Simple Gravel Path Checklist
☐ Plan the route
☐ Mark both sides
☐ Decide the width
☐ Remove grass and organic material
☐ Check drainage
☐ Install edging
☐ Prepare the base
☐ Compact the base
☐ Add gravel
☐ Rake the surface
☐ Finish surrounding planting
☐ Inspect and maintain
Final Takeaway
A gravel garden path is a simple project that can make a backyard feel more organized and usable.
The visible gravel may be the part everyone notices, but the real work happens underneath.
Take time to plan the route, prepare the ground, manage drainage, and create a stable base.
Then finish it with gravel that suits both your landscape and the way you intend to use the path.
A good garden path doesn’t just look beautiful—it makes the entire backyard easier to enjoy.
Final Takeaway
Use the guidance above as a practical starting point, then adjust for your space, climate, materials, and project goals.