How to Build a Simple Raised Garden Bed From Scratch
A raised garden bed is one of the easiest ways to create a dedicated growing space in your backyard. Here's how to plan the size, choose a location, prepare the ground, build the frame, fill it with soil, and get it ready for planting.
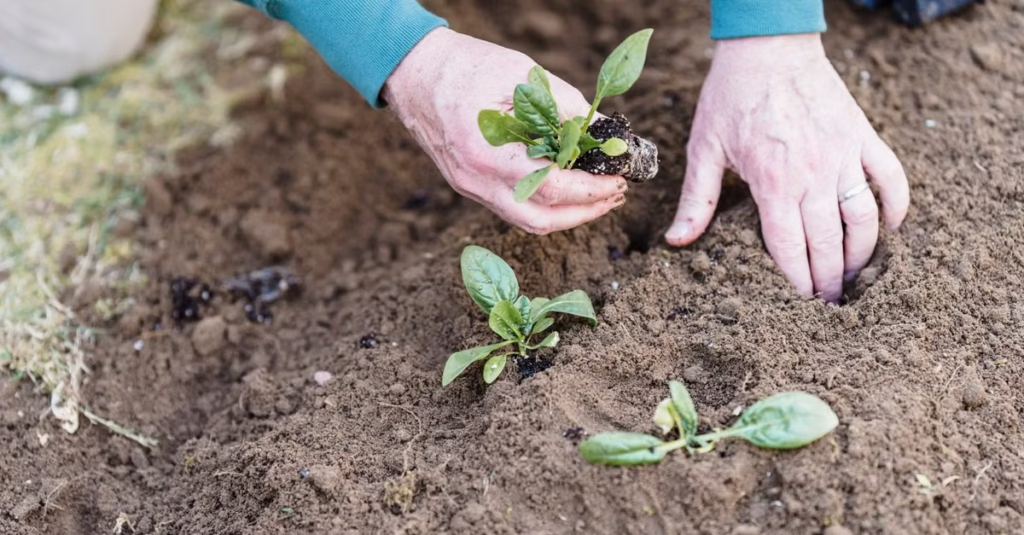
You don’t need a huge backyard to grow a productive garden.
A simple raised garden bed can turn an unused corner of your outdoor space into a dedicated growing area for vegetables, herbs, flowers, or a mixture of all three.
The best part is that a raised bed doesn’t have to be complicated.
With a few basic materials, some planning, and a free afternoon, you can build a straightforward garden bed that fits your space and growing plans.
Why Build a Raised Garden Bed?
Raised beds offer a simple way to create a defined growing area.
They can make it easier to:
- Organize plants
- Improve soil conditions
- Control the growing medium
- Separate garden areas
- Work without repeatedly walking through planting beds
- Create a cleaner backyard layout
They’re also useful when the existing ground soil isn’t ideal for the plants you want to grow.
Instead of trying to completely transform the entire yard, you can focus your effort on a smaller growing space.
Step 1: Choose the Right Location
Start by choosing where the bed will go.
Look for an area with suitable sunlight for the plants you intend to grow.
Vegetables generally need plenty of sunlight, while some herbs and ornamental plants can tolerate different conditions.
Also consider convenience.
A beautiful garden bed won’t be very useful if you have to walk across the entire property every time you need to water it.
Try to choose a location that is:
- Easy to access
- Relatively level
- Close to a water source
- Appropriate for your plants
- Away from regular foot traffic
Step 2: Decide How Large the Bed Should Be
Bigger isn’t always better.
One of the most important considerations is whether you can comfortably reach the center of the bed.
A bed that is too wide can force you to step into the soil to reach plants.
That can compact the growing area and make maintenance harder.
A narrower bed allows you to reach the plants from the outside.
Think about:
How far can I comfortably reach without stepping into the bed?
Let that answer guide your dimensions.
Step 3: Choose Your Materials
A basic raised bed can be built from suitable outdoor lumber.
Other options include:
- Cedar
- Other suitable untreated wood
- Composite boards
- Stone
- Brick
- Purpose-built raised-bed materials
Choose materials appropriate for outdoor use and your local conditions.
Avoid using materials that could introduce unwanted substances into your growing area.
For a first project, keep the design simple.
Four boards joined together can create a perfectly functional raised bed.
Step 4: Prepare the Ground
Before assembling the bed, prepare the location.
Remove large weeds, grass, and debris.
If the area is uneven, level it as much as practical.
You don’t necessarily need to remove every bit of existing soil.
The exact preparation depends on what you’re building and whether the bed will sit directly on the ground.
Step 5: Assemble the Frame
Lay the boards out in the shape of your bed.
Check that the corners are aligned.
Then secure the boards together using appropriate outdoor-rated fasteners.
Before tightening everything completely, check that the frame is square.
A simple way to check a rectangular frame is to compare the diagonal measurements.
If the diagonals are similar, the frame is likely square.
Step 6: Check the Bed Level
Place the assembled frame in its final position.
Use a level to check the top edges.
A perfectly level bed isn’t essential for every garden situation, but major slopes can create problems with water distribution and soil depth.
Make adjustments to the ground beneath the frame where necessary.
Step 7: Think About the Bottom
A raised bed doesn’t always need a solid bottom.
If your bed is sitting directly on suitable ground, plants can potentially root into the soil beneath it.
That can be useful for deeper-rooted plants.
However, situations vary.
If you’re building over a hard surface, such as concrete, you’ll need a different approach.
Think about the location before deciding how the bottom should be constructed.
Step 8: Fill the Bed With Growing Soil
This is one of the most important parts of the project.
Don’t simply fill a raised bed with random soil from somewhere else on the property.
Choose a suitable growing medium based on what you’re planning to grow.
A raised bed is an opportunity to create a better growing environment from the beginning.
You can think about the mixture in terms of:
- Soil
- Compost
- Organic matter
- Drainage
- Moisture retention
The exact mix can vary depending on local materials and what you’re growing.
Step 9: Calculate How Much Soil You Need
This is where measuring your bed becomes useful.
For a simple rectangular bed:
Length × Width × Depth = Cubic Feet
For example, imagine a bed that is:
8 ft long × 4 ft wide × 1 ft deep
The volume would be:
8 × 4 × 1 = 32 cubic feet
That gives you a starting point for estimating how much growing material you’ll need.
If you’re buying soil by the cubic yard:
Cubic feet ÷ 27 = cubic yards
So:
32 ÷ 27 ≈ 1.19 cubic yards
Our raised-bed calculator can make this calculation easier when you’re planning a project.
Step 10: Fill the Bed Gradually
Don’t dump everything into the bed at once and assume you’re finished.
Add material in layers.
Spread it evenly and check the depth as you work.
The soil will settle over time, so don’t be surprised if the level drops after watering.
You can top it up later if necessary.
Step 11: Plan Your Planting Layout
Before planting, think about where everything will go.
Place taller plants where they won’t unnecessarily shade shorter plants.
Consider:
- Plant spacing
- Mature size
- Sun exposure
- Water requirements
- Access
Don’t try to fit too many plants into the bed simply because there is empty space.
Plants need room to grow.
Step 12: Water the New Bed
After filling and planting, water the bed thoroughly enough to settle the growing medium.
Then establish a watering routine based on:
- Weather
- Soil moisture
- Plant requirements
- Season
- Drainage
Avoid watering simply because the calendar says you should.
Check the soil and plants first.
Step 13: Add a Simple Border or Path
A raised bed can look even better when the surrounding area is finished.
Consider adding:
- Mulch
- Gravel
- Stepping stones
- A simple garden path
This keeps the project visually defined and can make maintenance easier.
Common Raised-Bed Mistakes
Making the bed too wide
If you can’t comfortably reach the center, maintenance becomes frustrating.
Building before checking sunlight
Plants can’t compensate for an unsuitable location.
Using unsuitable materials
Choose materials appropriate for an outdoor growing environment.
Filling with poor soil
The growing medium is one of the most important parts of the project.
Forgetting access
Leave enough space around the bed to comfortably move, water, and harvest.
Overplanting
More plants doesn’t necessarily mean a better garden.
How Much Does a Raised Bed Cost?
The total cost depends heavily on:
- Bed size
- Lumber
- Fasteners
- Soil
- Compost
- Tools
- Delivery
- Finishing materials
The frame itself may be relatively inexpensive.
For larger beds, however, the growing material can become one of the biggest costs.
That’s why calculating the volume before purchasing soil can save both money and unnecessary trips to the garden center.
A Simple Raised-Bed Project Checklist
Before you begin:
☐ Choose the location
☐ Check sunlight
☐ Decide dimensions
☐ Choose suitable materials
☐ Prepare the ground
☐ Build the frame
☐ Check that it is square
☐ Level the bed
☐ Calculate soil volume
☐ Fill with suitable growing material
☐ Plan plant spacing
☐ Plant and water
☐ Finish the surrounding area
Final Takeaway
A raised garden bed doesn’t need to be an elaborate construction project.
Start with a practical size, choose a good location, build a simple frame, create a suitable growing environment, and give yourself enough room to maintain it comfortably.
The best raised bed is one you’ll actually enjoy using.
Build it simple. Fill it well. Grow something you’ll love.
Final Takeaway
Use the guidance above as a practical starting point, then adjust for your space, climate, materials, and project goals.